yuzuha_wasa/未来の扉を開けて
分类
标签
Apache apt Blogging Customization C语言 Demo DMA Example F4A0 F5529 FPGA Fuwari G2553 git GPIO HC-05 HC-06 HC32 HDSC IAP Keil Linux基础知识 Linux安全 Linux常用命令 Linux文件与目录管理 Linux文件全线管理 Linux文件操作 Linux用户管理 Linux的C语言编程 Linux系统监测 Linux项目 Manjaro mariadb Markdown matlab MCU MSP430 Nginx Nvidia openSUSE OSS phpmyadmin PWM Python Quartus RT-Thread Service SPI ST STM32 systemctl systemd TI Timer Typora Ubuntu Video VideoDecode zypper 中断系统 压缩包 图床 外部中断 定时器 定时器输入捕获 帮助命令 常用命令 开发环境 归档 数据库 数据结构 数据绘图 状态监控 编码器 网络基础知识 网络工具 蓝牙模块 虚拟机 资源分享 软件包管理器 邮箱服务器 防火墙
543 字
3 分钟
Linux Nginx和Apache的简单配置
apache2使用8080端口,使用Nginx将其反代到80端口
A、apache web服务
1、安装apache2
sudo apt install apache2
2、验证网页
直接访问虚拟机ip
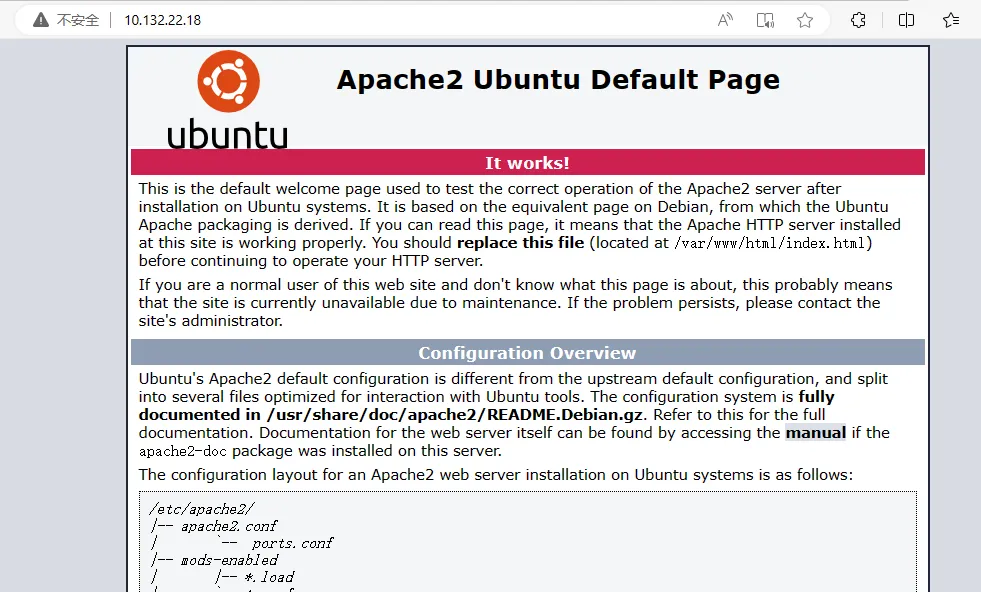
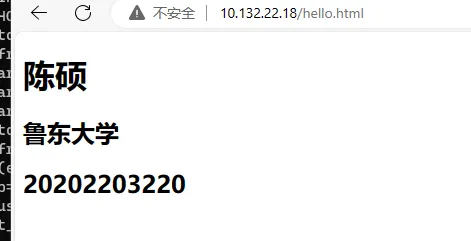
3、书写网页,将其添加到hello.html中
位置再/var/www/html,创建hello.html
<!DOCTYPE html>
<html>
<head>
<meta charset="utf-8">
<title>hello</title>
</head>
<body>
    <h1>陈硕</h1>
    <h2>鲁东大学</h2>
    <h2>20202203220<h2>
</body>
</html>
4、验证已经书写的网页
ip/hello.html
5、修改apache网页的端口为8080
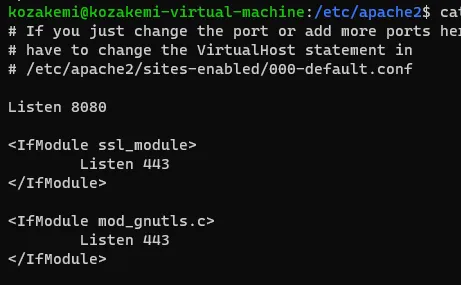
a、配置/etc/apache2/下的ports.conf文件
Listen 80 -> Listen 8080
b、配置/etc/apache2/sites-enabled$下的 000-default.conf文件
<VirtualHost *:80> -> <VirtualHost *:8080>

6、修改apache2的www目录,防止与nignx冲突
修改为www_a
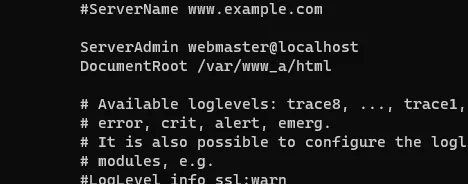
a、配置/etc/apache2/sites-enabled$下的 000-default.conf文件
DocumentRoot /var/www/html -> DocumentRoot /var/www_a/html
b、配置/etc/apache2/下的apache2.conf文件
<Directory /var/www/> -> <Directory /var/www_a/>
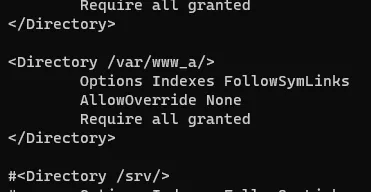
7、浏览器输入ip:8080、ip:8080/hello.html 验证
*补充,修改配置后使用systemctl restart apache2.service重启apache服务器
B、Nginx反向代理服务
之前已经将apache2的端口指向8080,现在只需要将端口指向80即可,就是反代
1、安装nginx
sudo apt install nginx
2、配置nginx
需要修改的配置文件位于/etc/nginx/sites-enabled的defaul文件
只需要修改server部分
server {
        listen 80 default_server;
        listen [::]:80 default_server;
        root /var/www/html;
        server_name _;
        location / {
                # First attempt to serve request as file, then
                # as directory, then fall back to displaying a 4
                proxy_pass http://127.0.0.1:8080/;
                #try_files $uri $uri/ =404;
        }
}
简单的静态页面80反代8080
3、重启nginx
sudo systemctl restart nginx.service
4、输入ip地址而不是ip:8080再次验证网页
C、配置防火墙firewall
ubuntu自带ufw,但是firewalld需要额外安装
简单介绍firewall
sudo apt install firewalld
检查运行状态
sudo systemctl status firewalld.service
检查运行区域
sudo firewall-cmd --get-default-zone
查看默认区域的规则
sudo firewall-cmd --zone=public --list-all
放行80端口
sudo firewall-cmd --zone=public --add-port=80/tcp --permanent
删除放行80端口
sudo firewall-cmd --zone=public --remove-port=80/tcp --permanent
ban ip
sudo firewall-cmd --permanent --add-rich-rule="rule family="ipv4" source address="10.132.22.231" port protocol="tcp" port="80" reject"
sudo firewall-cmd --permanent --add-rich-rule="rule family="ipv4" source address="10.132.22.106" drop"
unban ip
sudo firewall-cmd --permanent --remove-rich-rule='rule family="ipv4" source address="10.132.22.106" reject'
直接删除之前的规则
reject拒绝 drop丢弃
重新加载
sudo firewall-cmd --reload
1、放行80端口
sudo firewall-cmd --zone=public --add-port=80/tcp --permanent
2、ban掉部分ip
sudo firewall-cmd --permanent --add-rich-rule="rule family="ipv4" source address="10.132.22.106" reject"
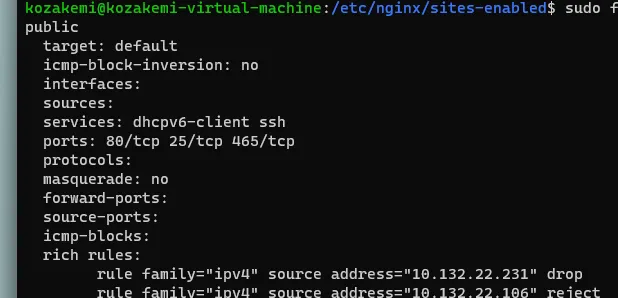

解ban:


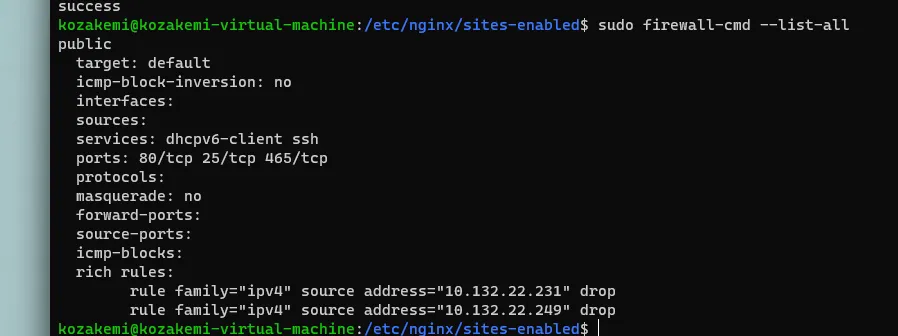
3、最终结果
apache2使用8080端口
编写网页hello.html
使用nginx将8080反代到80
ban掉除80与ssh相关的端口
ban掉教师ip10.132.22.231
ban掉测试ban ip10.132.22.249
对放开ip10.132.22.65不做处理
Linux Nginx和Apache的简单配置
https://kozakemi.top/posts/linux-nginx和apache的简单配置/
